Shutter Speed Explained with Examples: Mastering Shutter Speed Photography
Introduction
Shutter speed is one of the foundational concepts every photographer must understand to take full creative control of their images. Whether you’re just starting out or looking to refine your technique, mastering shutter speed photography opens up new possibilities—from freezing fast action to creatively conveying motion through blur.
At its core, shutter speed refers to the length of time your camera’s shutter remains open when taking a photo. This duration directly affects how much light hits the sensor and how movement is captured. A fast shutter speed can freeze a hummingbird’s wings mid-flight, while a slow shutter speed can blur flowing water, creating dreamy effects.
Many photographers struggle with shutter speed because it’s intertwined with other exposure settings like aperture and ISO. However, understanding shutter speed in isolation—and practicing with real-world scenarios—can dramatically improve your control over image sharpness and creative expression.
This article will break down shutter speed photography step-by-step, explain key concepts like motion blur photography, and provide practical examples you can try today. We’ll also cover how shutter speed impacts your photography business workflow, from choosing gear to shooting events and editing efficiently.
By the end, you’ll have a clear grasp of shutter speed and how to use it confidently, whether you’re shooting portraits, sports, landscapes, or street photography. Let’s dive in.
Key Takeaways
– Shutter speed controls how long your camera’s sensor is exposed to light and affects motion capture in your photos.
– A fast shutter speed freezes motion, ideal for action shots and sharp images.
– A slow shutter speed creates motion blur photography effects, which can add artistic movement or convey speed.
– Balancing shutter speed with aperture and ISO is essential for proper exposure.
– Practical knowledge of shutter speed improves your ability to shoot diverse subjects and situations confidently.
– Understanding shutter speed can enhance your photography business by improving client satisfaction and workflow efficiency.
– Experimenting with shutter speed helps build creative skills and expand your photographic style.
– Avoid common mistakes like using shutter speeds too slow for handheld shooting or not compensating ISO/aperture when changing shutter speed.

What is Shutter Speed in Photography and Why Does it Matter?
Shutter speed refers to the amount of time the shutter inside your camera stays open when taking a photo. It is measured in seconds or fractions of a second—such as 1/250, 1/60, or 2 seconds. This time determines how much light reaches your camera’s sensor and how movement is captured.
Why does shutter speed matter? Because it affects two critical elements:
1. Exposure: Longer shutter speeds let in more light, brightening your image; faster shutter speeds reduce light, making the image darker.
2. Motion Rendering: Shutter speed controls whether moving subjects appear sharp and frozen or blurred.
For example, a shutter speed of 1/1000 of a second can freeze a diving bird mid-air, while a speed of 1/4 second will blur the bird’s motion, showing a trail of movement. This dual role means shutter speed is a powerful creative tool.
Understanding shutter speed is essential for achieving your desired photo style—whether you want crisp, sharp images or dreamy motion effects. It also influences technical settings, such as when shooting in low light or capturing fast action.
How to Choose the Right Shutter Speed for Different Photography Genres
Different photography genres demand different shutter speeds. Here’s a practical breakdown:
– Sports and Wildlife: Use a fast shutter speed (1/500 sec or faster) to freeze quick movements like running athletes or flying birds. If you want to capture motion blur intentionally (e.g., a racing car’s wheels), slightly slower speeds like 1/125 to 1/250 sec work well.
– Portraits: Typically, shutter speeds around 1/125 to 1/250 sec are sufficient to avoid motion blur from slight subject movement or camera shake. Faster speeds can be used if your subject is moving.
– Landscape: Often uses slow shutter speeds (1/15 sec and longer) to capture more light and create smooth water or cloud motion blur effects, especially when using a tripod.
– Street Photography: Generally requires shutter speeds of 1/125 sec or faster to freeze candid moments, but panning techniques with slower speeds can add dynamic motion blur.
– Night Photography: Slow shutter speeds (seconds to minutes) are common to capture low-light scenes, stars, or light trails, always requiring a tripod.
By matching shutter speed to the subject and lighting, you ensure technically sound images and open creative possibilities.
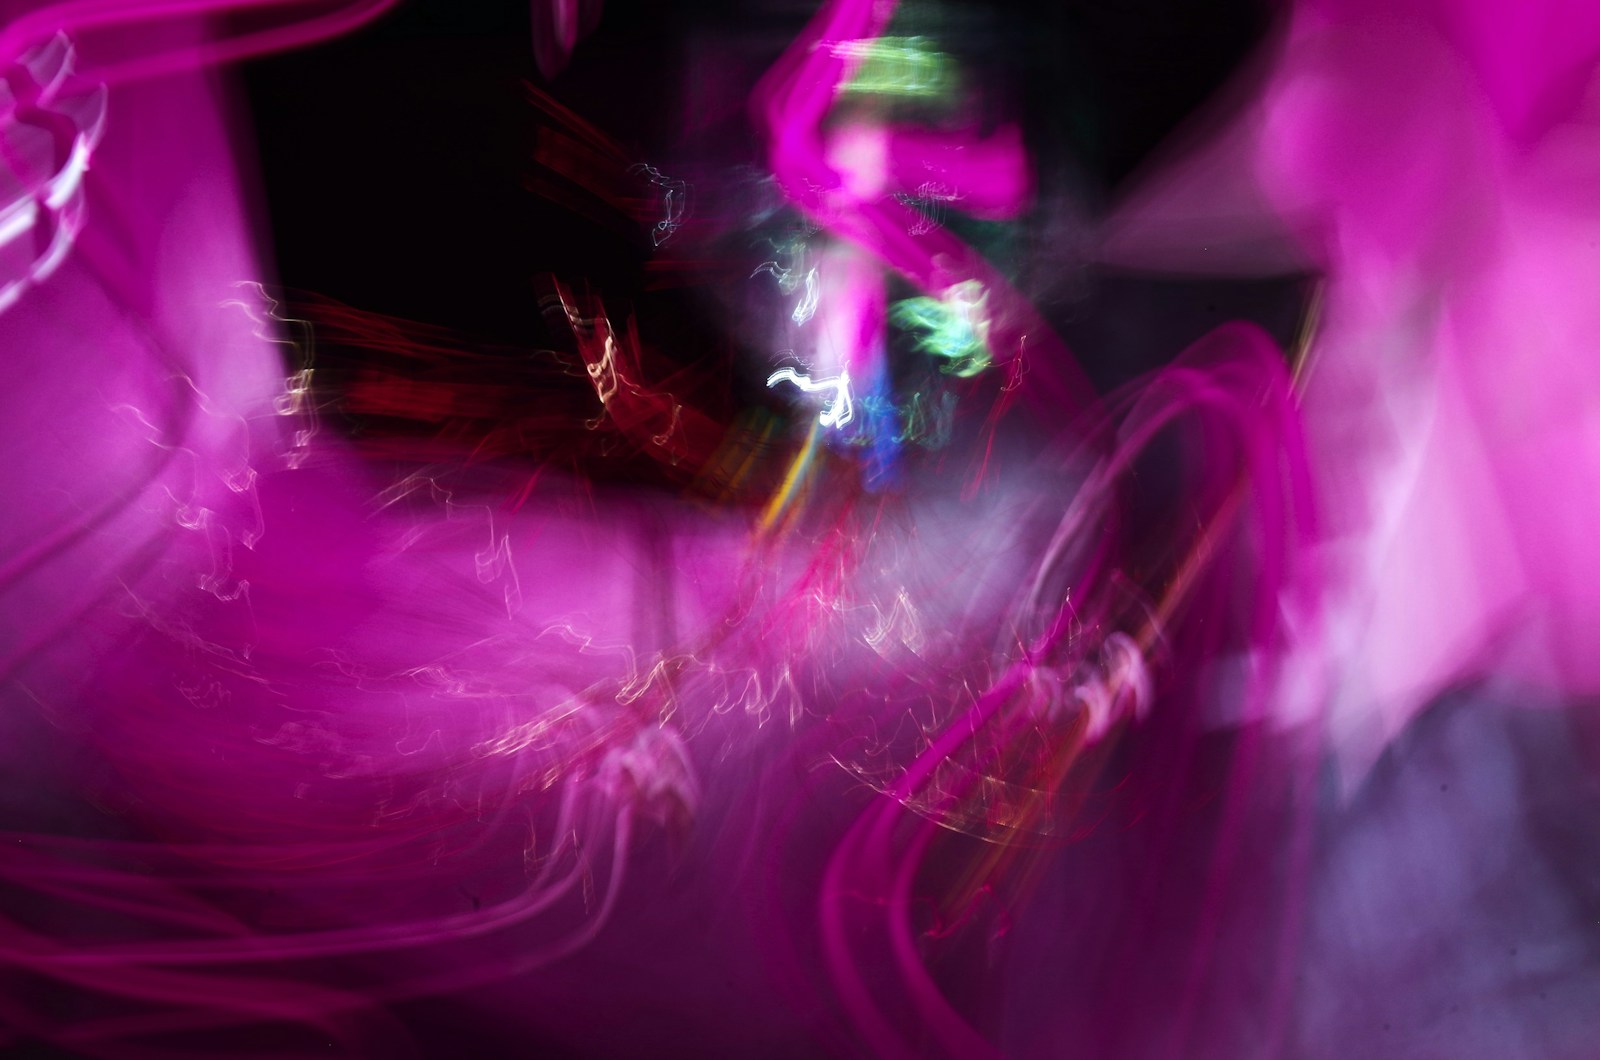
Practical Examples of Motion Blur Photography and When to Use It
Motion blur photography uses slow shutter speeds to intentionally blur moving subjects or backgrounds. This technique conveys speed, energy, and time passing—adding dynamic storytelling to your images.
Examples include:
– Waterfalls or Rivers: Using a shutter speed of 1/4 to several seconds smooths the water, creating a silky effect.
– Light Trails: Cars or bike lights at night can be captured with shutter speeds from 5 seconds to 30 seconds, showing trails of light.
– Panning Shots: Tracking a moving subject (like a runner or cyclist) with a shutter speed around 1/60 to 1/125 sec blurs the background while keeping the subject sharp, emphasizing motion.
– Crowded Streets or Events: Slow shutter speeds can blur crowds, showing bustling energy or ghost-like figures.
To practice, pick a moving subject and gradually slow your shutter speed while stabilizing your camera on a tripod or steady surface. Notice how the blur changes and experiment with different speeds and focal lengths.
Motion blur photography is a creative tool you can add to your repertoire, enabling storytelling beyond frozen moments.
Fast Shutter Speed Tips: How to Freeze Action and Capture Sharp Images
Using a fast shutter speed is critical when photographing fast-moving subjects. Here are practical tips:
– Start at 1/500 sec: This speed is a good baseline for freezing action like kids playing, pets running, or street scenes.
– Increase shutter speed for faster subjects: Sports, birds in flight, or motorsports often require 1/1000 sec or faster.
– Use burst mode: Shooting in continuous mode increases your chance of capturing the perfect moment.
– Increase ISO if needed: To maintain fast shutter speeds in low light, raise your ISO setting but be aware of noise.
– Use wide apertures: Combining fast shutter speed with a wider aperture (small f-number) lets more light in, balancing exposure.
– Stabilize your camera: Even with fast shutter speeds, handholding properly helps avoid blur.
– Prefocus and anticipate action: Pre-focusing on where action will happen minimizes focus lag.
For example, if you’re photographing a soccer game on an overcast day, you might set your camera to shutter priority mode at 1/1000 sec, ISO 800, and a wide aperture like f/4. This combination freezes the players while maintaining exposure.
Understanding the Relationship Between Shutter Speed, Aperture, and ISO
Mastering shutter speed photography means balancing shutter speed with aperture and ISO for proper exposure. These three settings together form the exposure triangle:
– Shutter Speed: Controls how long light hits the sensor.
– Aperture: Controls how much light enters through the lens opening.
– ISO: Controls the sensor’s sensitivity to light.
If you increase shutter speed (faster shutter), less light reaches the sensor, so you need to compensate by opening the aperture (lower f-number) or increasing ISO. Conversely, slowing shutter speed lets in more light, so you can close the aperture or lower ISO.
For example, if your correct exposure is 1/60 sec, f/8, ISO 400, but you want to freeze fast motion by increasing shutter speed to 1/500 sec (which is about 3 stops faster), you must either open the aperture to f/2.8 or increase ISO to around 3200, or a combination of both.
Experimenting with these settings and understanding their trade-offs is essential for creative control and avoiding underexposed or noisy images.
How Shutter Speed Affects Your Photography Business Workflow
Beyond technical mastery, understanding shutter speed impacts your photography business workflow in several ways:
– Client Satisfaction: Knowing how to freeze motion or create motion blur lets you meet client expectations—whether they want crisp portraits, dynamic sports images, or artistic landscapes.
– Shooting Efficiency: Fast shutter speeds reduce the risk of motion blur, decreasing the need for reshoots and saving time during sessions.
– Gear Selection: Investing in lenses with wide apertures or cameras with good high-ISO performance supports using fast shutter speeds in varied conditions.
– Editing Workflow: Correct shutter speed choices minimize post-processing fixes like motion blur removal or noise reduction, streamlining editing.
– Marketing: Showcasing mastery of shutter speed techniques in your portfolio attracts clients seeking specific photographic styles.
– Pricing: Offering specialty services like action photography or artistic motion blur shots can command premium rates.
For example, a wedding photographer who understands shutter speed can quickly switch settings to capture both sharp ceremony moments and creative slow-shutter portraits, improving client experience and efficiency.
Step-by-Step Guide: How to Practice and Improve Your Shutter Speed Photography
Improving shutter speed photography is about deliberate practice and experimentation. Follow this simple framework:
1. Understand Your Camera Settings: Learn how to manually adjust shutter speed, aperture, and ISO.
2. Start in Shutter Priority Mode: Set shutter speed and let the camera choose aperture, focusing on motion effects.
3. Choose Moving Subjects: Pick subjects like cars, pets, or people walking to observe how different speeds affect motion capture.
4. Use a Tripod for Slow Speeds: Stabilize your camera when trying long exposures to avoid camera shake.
5. Experiment with Fast Speeds: Practice freezing action at 1/500 sec, 1/1000 sec, and faster.
6. Try Motion Blur Techniques: Slow down shutter speed to create creative blur effects.
7. Review and Analyze: Examine your images on a large screen, noting sharpness and blur.
8. Adjust and Repeat: Change shutter speeds and settings based on results.
9. Incorporate into Real Shoots: Apply your knowledge in actual sessions like events or portraits.
10. Seek Feedback: Join photography groups or forums to get constructive critiques.
By following this methodical practice, you build confidence and skill in shutter speed photography.
Common Mistakes
Many photographers, especially beginners, make common shutter speed mistakes that limit their image quality or creative potential. Here are some pitfalls to avoid:
– Using Shutter Speeds Too Slow for Handheld Shots: Without a tripod, shutter speeds slower than 1/60 sec often cause camera shake blur. This is a frequent cause of blurry photos.
– Ignoring Motion of the Subject: Even if the camera is steady, a slow shutter speed can blur moving subjects unintentionally.
– Not Adjusting ISO or Aperture When Changing Shutter Speed: Changing shutter speed without compensating exposure settings leads to under- or overexposed photos.
– Relying Too Much on Auto Modes: Auto modes may not choose optimal shutter speeds for creative effects or action photography.
– Not Using Burst Mode for Action: Missing multiple frames reduces chances of capturing peak moments.
– Overusing High ISO to Compensate for Fast Shutter Speeds: Excessive ISO increases noise and reduces image quality.
– Ignoring Lens Stabilization: Image stabilization doesn’t freeze subject motion, only reduces camera shake.
– Failing to Pre-focus: Waiting to focus during fast action can cause missed shots or blur.
For example, a photographer shooting a soccer match at 1/30 sec will likely get motion blur, even if the players are sharp in focus. Raising shutter speed and adjusting settings accordingly would solve this.
Avoiding these mistakes requires building awareness of shutter speed’s impact and practicing deliberate control.
What to Do Now
Ready to improve your shutter speed photography? Here’s an actionable plan to put your new knowledge into practice and enhance your photography skills and business.
1. Review Your Camera Manual: Understand how to set shutter speed manually and how it interacts with aperture and ISO.
2. Experiment Daily: Choose a moving subject each day—cars, pets, people—and shoot at various shutter speeds to see effects firsthand.
3. Use Shutter Priority Mode: Start shooting in shutter priority (Tv or S mode) to focus on mastering shutter speed control without worrying about other settings.
4. Practice Motion Blur Techniques: Use a tripod and slow shutter speeds to capture flowing water, light trails, or panning shots.
5. Shoot Action with Fast Shutter Speeds: Increase shutter speed to freeze motion in sports, wildlife, or street photography.
6. Analyze Your Results: Review images critically on a larger screen—note sharpness, blur, and exposure.
7. Adjust Exposure Triangle: Practice balancing aperture and ISO with shutter speed changes to achieve correct exposure.
8. Integrate into Client Sessions: Apply shutter speed control in your next photo shoot to increase variety and quality.
9. Update Your Portfolio: Add images demonstrating your shutter speed skills to attract clients seeking dynamic or artistic photos.
10. Continue Learning: Join photography workshops or online communities focused on exposure and motion techniques.
By following this step-by-step approach, you’ll build both technical expertise and creative confidence, setting yourself apart as a skilled photographer.
FAQs
1. What is the best shutter speed for beginners to start with?
Beginners should start by experimenting with shutter speeds around 1/125 to 1/250 seconds. These speeds are fast enough to reduce camera shake and blur from minor subject movement but slow enough to allow you to observe how motion is captured. Using shutter priority mode at these settings helps you focus on understanding shutter speed without worrying about aperture or ISO initially. As you grow comfortable, gradually try faster shutter speeds for action or slower speeds for motion blur effects.
—
2. How does shutter speed affect motion blur photography?
Shutter speed directly controls motion blur in photos. Slower shutter speeds keep the camera’s sensor exposed longer, allowing moving subjects to leave blurred trails that convey motion and energy. For example, a shutter speed of 1/4 second might blur a flowing river, creating a smooth, dreamy effect. Conversely, faster shutter speeds freeze motion, minimizing blur. Mastering shutter speed lets you choose whether to capture sharp action or artistic blur, depending on your creative goals.
—
3. When should I use a fast shutter speed in my photography?
Use a fast shutter speed (generally 1/500 seconds or faster) when photographing fast-moving subjects such as sports, wildlife, or children playing. Fast shutter speeds freeze motion, ensuring sharp images without blur caused by subject movement. Additionally, fast shutter speeds are useful in bright conditions or when shooting handheld to avoid camera shake. Adjust ISO and aperture to maintain proper exposure while using fast shutter speeds.
—
4. Can I use slow shutter speeds handheld without a tripod?
Using slow shutter speeds handheld is challenging because even slight hand movements cause camera shake, resulting in blurry images. A common rule is to use a shutter speed equal to or faster than the reciprocal of your lens’s focal length (e.g., 1/50 sec for a 50mm lens). For slower shutter speeds, always use a tripod or stable surface. Some cameras and lenses have image stabilization that helps reduce shake but won’t compensate for subject motion.
—
5. How does shutter speed interact with aperture and ISO?
Shutter speed, aperture, and ISO form the exposure triangle, working together to control image brightness and quality. When you increase shutter speed to freeze motion, less light reaches the sensor, so you often need to open the aperture (lower f-number) or raise ISO to compensate. Conversely, slowing shutter speed lets in more light, allowing you to use a smaller aperture or lower ISO to maintain exposure. Balancing these settings is crucial for sharp, well-exposed images.
Conclusion
Understanding shutter speed photography is a crucial step toward mastering your camera and creating compelling images. Shutter speed determines how motion is captured in your photos—whether freezing fast action with a fast shutter speed or crafting artistic motion blur with slower speeds. This knowledge empowers you to creatively control exposure and movement, enhancing both technical precision and artistic expression.
For photographers building their business, shutter speed proficiency improves shooting efficiency, client satisfaction, and portfolio diversity. You’ll confidently capture dynamic moments at events, produce stunning landscapes with motion effects, and deliver sharp portraits that clients love.
Remember, shutter speed doesn’t work in isolation—it’s part of the exposure triangle alongside aperture and ISO. Balancing all three settings unlocks full creative flexibility and image quality.
Start practicing today by experimenting with shutter speeds in various scenarios, analyzing your results, and applying your skills in real shoots. Whether you’re a beginner or a seasoned pro aiming to refine your craft, mastering shutter speed photography elevates your work and sets you apart in the competitive photography market.
With consistent practice and thoughtful application, shutter speed becomes a powerful tool in your photographic toolkit—helping you tell stories through images that captivate, inspire, and impress.